This article covers the making of Rye bread using the scalding method. It can really be used with any grain that you may want to increase the flavor on, so I used Rye although my favorite is Red Wheat.
I have been making my own bread for a while now making my flour from scratch. I was intrigued when I saw a baker get twice as much water into the recipe by using the scalding method. I will describe the process and technique that I used with impressive results.
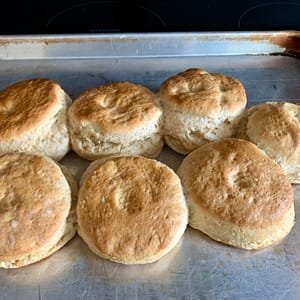
This is the final result and a good one at that. The crumb was soft, tight to medium, and delicious.

The Scald (750 g Total)
250 g of Rye grain ground to the finest setting. I did not sift anything out of this grain, left it all in.
500 g of water brought to a boil.

Combine the two and stir them together to make a paste. This will have to rest until the temperature drops because it will kill your leaven above 105 degrees, too hot for the hot tub.
Be careful to ensure that you mixed it well because little dough balls might be present in the final product. I simply used a mixing spatula and smashed it against the side of the bowl a few times to make sure they were all removed. I later used the mixer with a scraper blade and it worked great.
I will let it cool and then cover it with plastic wrap. If I don’t use it right away, I put it in the fridge. It’s good for up to 3 days from what I have heard and tested.
The Bread (Approx. 3 loaves 800 g each)
700 g of water heated to 105F roughly.
I use this number because of different variables like bowl temp, other ingredients I will be adding, etc. The target temp for the party in the bread to rise is 82F. Keep an instant thermometer handy to check things as you proceed.
990 g Total Flour broken down this way.
790 g of hard red wheat flour. This has been sifted to about 80%
200 g of fresh ground wheat flour, unsifted. (optional) I will add 200 grams to the 790 if I don’t use fresh wheat here.
375 g of leaven (25-30% of Flour)
30 g of honey (Preference)
30 g of salt (3% of total flour)
70% Hydration on the base bread recipe.
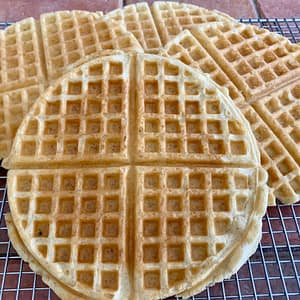
My leaven feeding is 100g water/100g flour/100g leaven. When I do this recipe I double it and then use 375 for the dough, 100 for the feeding, and anything left goes into my waffles.
Mix it together
In a large bowl, water first, always water first. Make sure the temperature is right.
Add flour, leaven, roux, honey, and salt.
In a mixer, this will go for about 7-15 minutes on low, scraping the sides a few times, depending on the mixer. I had a smaller mixer (3qt) which was miserable, then I went to a 6qt and it went much better.
MIXER TIP
I used to have some fear of the mixer because of people claiming over-mixed dough. To me, this is really difficult because of the hydration level. I use my eyes and touch to determine the readiness of the dough. Just watch for a smooth consistency that wraps around the dough hook. You will know it when you see it.
I will also scrape the mix bowl a couple of times through this mixing process and that may mean pouring it out on the counter to get whats in the bottom.
Do not be afraid, people have been doing this for centuries and no mixer.
Let it rise
12-16 hour rise time depending on your environment. I do have a proofing oven that helps to keep the temperature constant but found that a bowl of boiled water in the bottom of the oven works really well without turning it on.
If you know your leaven peak timing, work towards that goal. I keep my leaven jar on the counter with sharpie marks on the side of it to determine peaks. Remember not all of the leaven was used in the recipe, it’s a great indicator of when to bake.

Shape it
There should be around 2500 g of dough that can be separated into 3 loaves @ 800 g each or whatever you like.
Once separated I then form it, wait 20 minutes, then shape it, let it rise some more in the bannetons eventually moving it to the refrigerator for a day or two. I like to bake in the morning to warm up the house.
Rice Flour
The best trick in the book. I make my own wheat flour and now rice flour too. I just have a small tub of it and roll the bread in it before moving it to the bannetons. This does 2 things. It does not change the hydration of the bread like flour will, and it keeps anything from sticking to it.
Bake it
475 degrees in a dutch oven, this will produce a dark crust like the picture above. You can certainly reduce the temp, getting a lighter result with a softer crust. My advice is to bake the loaves separately at different temperatures to get the crust that you like.
20 minutes with the lid on and 20 minutes with the lid off. Internal temp between 199-203 F.
The change in temperature of the oven does not mean it will take longer to cook, keep the time the same and just check the temperature because every oven is different.
With Rye, I have learned it’s best to wait 24 hours before cutting, but who can wait that long? Not me.
Tip
Some have said that a bread pan below the rack of the dutch oven will lighten the bottom crust if you do not like it so dark. A 500-degree iron has a tendency to make things crispy.
I have tried many temperatures to test this out, initially 475 gets the best pop on the bread from my experience. Turning it down after about 10 minutes to 425 will keep that bottom in check throughout the rest of the cook.

Conclusion
I am at 5200 feet, living just south of Denver. This recipe worked fine. The hardest thing at this altitude was to determine my leaven’s rise and fall timelines. Once I had that timing down, I could figure out the rest.
I added markings with a sharpie to reference the rise. At 6 hours it will hit the top marking and stay for a couple of hours. If I want to extend the rise I will feed the leaven at this point again and use it the next morning.
An even better trick is to use this indicator in parallel with the bread rise with a 2nd leaven jar. This allows me to know the best baking times instead of guessing because of temperature changes or forgetting when I fed it last. So I will use 200 g of leaven in my bread while feeding the other 100 g in a different jar with the base recipe (100g/100g/100ml). That way I have a visual indicator of its peak time.

Update:
What I have found since the start of this process.
Yudane is a Japanese version of water roux and Tangzhong is a Chinese version of water roux added to the dough. They act as natural dough improvers. Yudane is made with 1:1 ratio of flour and hot boiling water and usually, the amount of flour used is about 20% of the total amount of flour in the recipe. Tangzhong is made with 1:4 or 1:5 ratio of flour and water cooked into a paste. The amount of flour used is about 7-10% of the total amount of flour in the recipe.
Yudane needs to be prepared at least 4 hours before you use it; you just need hot boiling water to gelatinize the starch. Tangzhong can be used on the same day as long as it has cooled down completely before you use it. Tangzhong is prepared by cooking the flour and liquid on the stove until it turns into a paste. Both give great results. It’s just a matter of convenience. I usually prepare yudane or tangzhong in bigger batches, then portion them out and store them in the fridge for up to 3 days or in the freezer for about one month. https://whattocooktoday.com/soft-fluffy-asian-steamed-buns-every-time.html